
"Holiday Party" Makeup Tutorial

I had the absolute BEST time, collaborting with a couple good friends, on this holiday inspired makeup tutorial. My amazing friend and photographer, Shaylynn (owner of Shaylynn Marie Photography) was the beauty behind the lense. She is so fun and energetic, and is truely passionate about what she does. It was really through her encouragment and excitement, that led to the creation of this project. Her enthusiasm is so infectious...I just LOVE working with her! As for our insanely gorgeous model, that would be our friend, Kari. I can seriously not get enough of that face...those bright blue/green eyes, amazing smile and THOSE DIMPLES! Gahh...to die for! She is such a beautiful person inside and out, and we were so excited to have her join in on this. Now, let's get on into it! ENJOY!
--------------------------------------------------------------------------------------------------------
Step #1 - Cleansing and Priming

First and foremost, a beautiful makeup application starts with a clean, smooth canvas. Make sure your skin is cleansed, exfoliated and moisturized. Allow moisturizer to sink in for at least 5 minutes before applying a primer. To prime her skin, I used "the POREfessional" by Benefit. It fills in pores and fine lines, and helps your foundation stay on a lot longer than it normally would. To prime the eyes, I applied "Mineral Eyeshadow Primer" by e.l.f., with my finger all over the lip and up to the brow bone. This will help prevent your shadows from creasing, and make your colors appear more vibrant.
Step #2 - Concealing and Highlighting

Apply your foundation, concealer and highlighter (in that order). For foundation, I used "Airflash" spray foundation by Dior, in the color "Linen", which I applied with an "F80 flat top Kabuki" brush by Sigma. To conceal under her eyes, around her nose, and chin, I applied a "Pro Longwear Concealer" by MAC, in the shade "NW20", with an "F86 Tapered Kabuki" brush by Sigma. To highlight, as shown in the photo, I chose the "Visible Lift CC Multi-Action" roller ball by L'Oreal, in the color "Light", and blended it out with the same "F86" brush. To make all of these cream products last longer, apply a light dusting of powder over the whole face. The powder I used is an "Ambient Lighting Powder" by Hourglass, in the shade "Dim Light". This product gives off a beautiful soft-focus glow.
Step #3 - Eye Contouring

To begin the eye makeup, choose a mid-tone, matte brown shadow and apply to the crease in a windshield wiper motion, blending upward towards the eyebrow. Here, I used the light brown shadow from "The Lolita" palette by Marc Jacobs, with an "E40 Tapered Blending" brush by Sigma. This color helps to contour your eye shape, while providing a base that will aid in the blending of the other colors.
Step #4 - Main Lid Color


For the main lid color, pick a dark shimmery shadow, and apply it to the inner and outer corners of the lid, not going above the original crease color. I chose the color "Snakebite" from the Urban Decay "Naked 2" palette, with flat shader brush by Sonia Kashuk. When using dark shadows, I hold a tissue below the eye to catch any fall out it may have. That way, you don't have to go back and touch up concealer later.
Step #5 - Highlighting and Blending Eyeshadow


To highlight the eyes, apply a light matte color (a shade or two lighter than your skin tone), right under your brows. I used the lightest shade in "The Lolita" palette by Marc Jacobs, with an "E60 Large Shader" brush by Sigma. This will not only define your brows, but also make them appear lifted. At this point, we are going to blend our shadows with a clean brush, using the same windshield wiper motion as I mentioned in the first step. I used a "217" blending brush by MAC for the outside corners, and then an "E30 Pencil" brush by Sigma, to get into the smaller inner corners. Be sure to use a light hand while blending, and take your time, going back and forth between both eyes, to ensure equal proportions.
Step #6 - Lower Lashline

With the same "E30 Pencil" brush by Sigma, I went back into the first light brown shadow, and blended it from outer to inner corner on the lower lashline. To give even more definition, you can take the dark brown shimmery shade that we used on the lid, and blend that from the outer corner to about half way in, as shown here. Keeping it more concentrated on the outside corner, will widen and elongate the eyes, making them appear bigger.
Step #7 - The Center Sparkle

Now, what would a holiday look be without some sparkle? Applying a sparkly gold shadow to the bare center lid, will make them look bigger, and when the light catches with your movement, it just looks incredible! My favorite way to apply these kind of shadows, is with my finger. By pressing it in with your finger, it helps alliviate fall out and makes it appear more vibrant. The shade I used, is the gold "Long-lasting Lustrous Eyeshadow" by e.l.f.
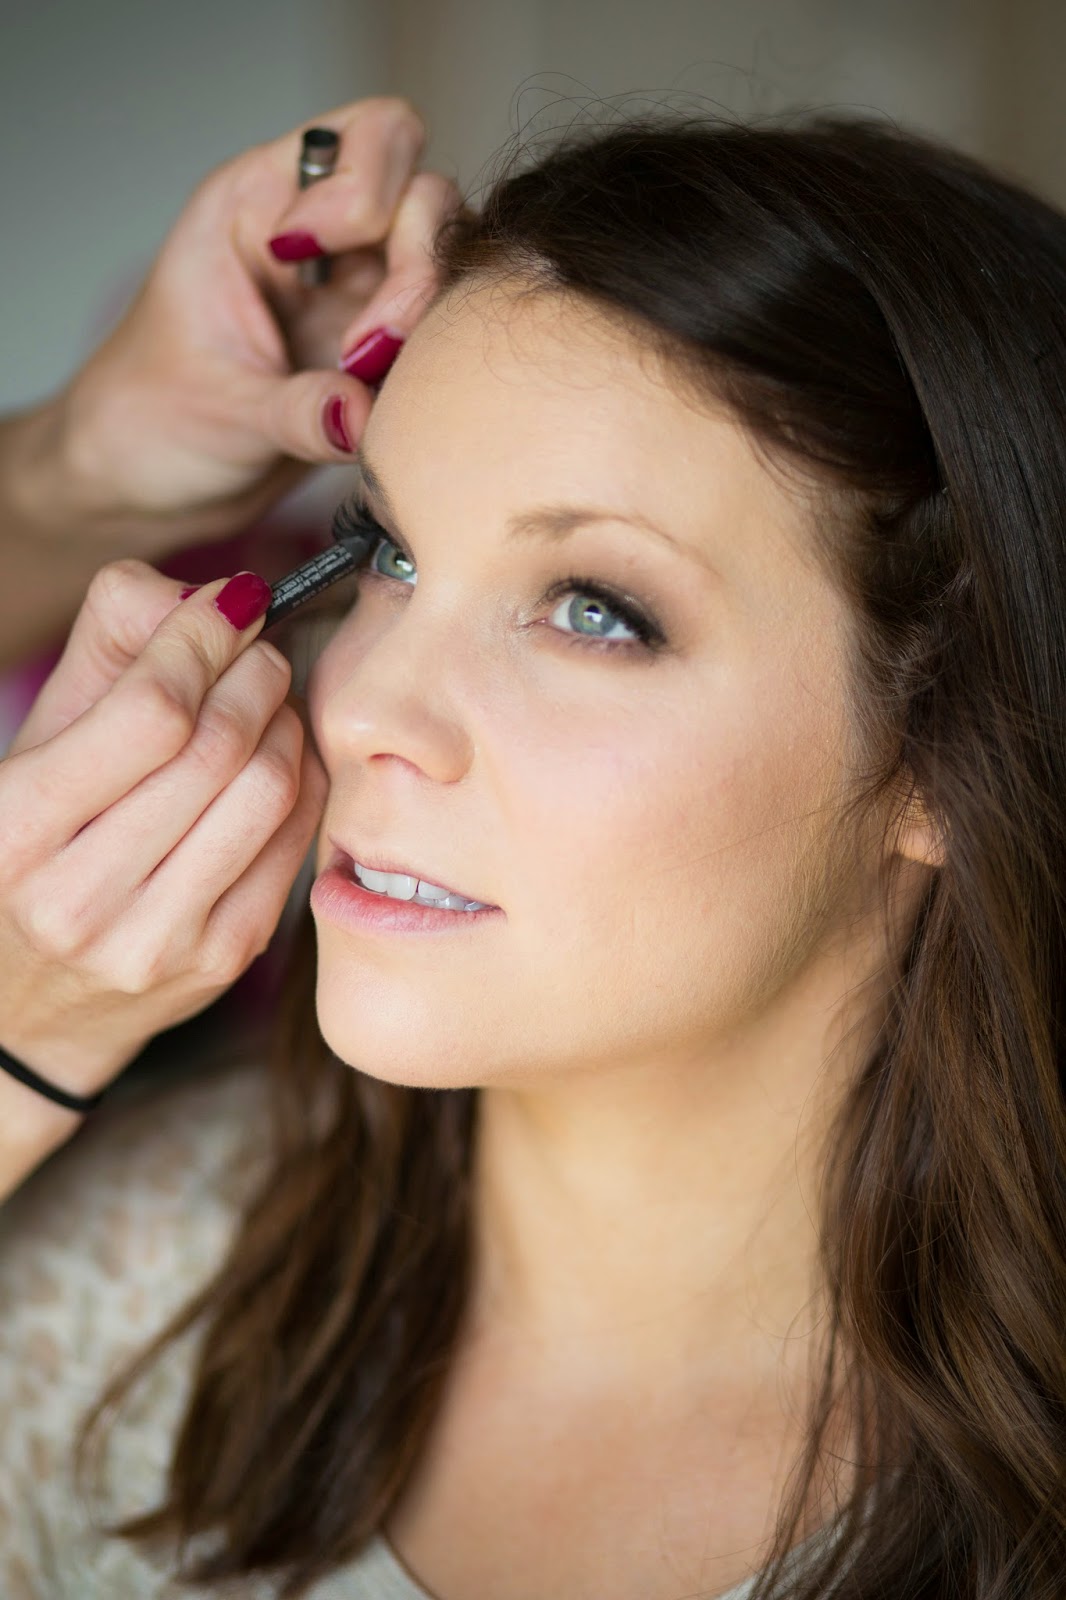
Step #8 - Eye Liner and Mascara


To give definition to the upper lashline, apply a dark brown pencil, concentrating most of the color at the outer corner. The one shown is the "Scandaleyes Waterproof" pencil by Rimmel, in the color "brown". Then curl your lashes (if needed), and put on one coat of mascara. If your lashes have trouble keeping their curl, using a waterproof mascara will hold them better. Here I used the waterproof "Lash Blast Volume" by Covergirl.
Step #9 - False Lashes


To amp up the drama on the eyes, I chose to add false lashes. If you tend to have watery eyes, or have trouble applying these, then cutting them in half will help you tremendously! I used the "Ever EZ Lashes" by KISS, in style "11". I cut them in half, and applied the "Dark Lash Adhesive" by Revlon. The biggest tip I can give here, is to hold the strip with tweezers, let the glue get a bit tacky (30 seconds or so), and then apply them to the outside corner as close to your natural lashes as possible. To hide to band of the lash strip, apply a gel eyeliner with a liner brush, over the top. I like to use Rimmel's "black gel eyeliner", with the "Angled Liner Brush" by e.l.f. To further blend the false lashes with your natural lashes, apply another coat of mascara and a black pencil liner to the inner rim of your lashes. This is called "tight-lining", giving the effect of thicker, fuller lashes.
Step #10 - Brows & Contouring and Highlighting your Face


If needed, fill in any sparse areas in your brows, with a powder that matches your hair color. I acheived this by applying the "Dark Brown Brow Powder" by Anastasia, with a Sigma "E65 Small Angle" brush. Earlier, we applied foundation to even out skin tone and create a blank canvas. Now, we need bring you back to life, and put some color into your face. To contour, I use and angled brush and a matte brown powder, a few shades darker than your skin tone. Blend the contour shade around your hairline, under your cheekbones, below your jaw and chin, and down the sides of the nose. There should be no visible lines, you just want to create "shadows". Here, I used "Hoola" bronzing powder by Benefit, with a Sigma "F40 Large Angled Contour" brush. To give yourself a flush, go in with a berry colored blush (with the same brush), and apply to the apples of your cheeks, blending it back into your contour shade. Shown here, is "Berry Merry" blush by e.l.f. When highlighting, you'll want to emphasize the high points of your face (cheekbones, bridge of nose and right above your top lip). I used "Pinktastic" highlighting powder by e.l.f., with a Sigma "F60 Foundation" brush. Using a flat brush like this, gives off more shine than a flushy brush would. You'll be amazed at the dimension this gives to your face!
Step #11 - Lips


If you'd like to keep all the attention on your eyes, then a nude lip would be perfect for this look! Begin by lining and filling your lips with a pinky-brown light nude lipstick. Shown here is "Nearly Nude" twistable lipstick by e.l.f. Then, top it with a light rosy-pink gloss, to give a tad more color and shine. The one I used is "Guilty Pleasure" by Starlooks.
Step #12 - Next Level Glam


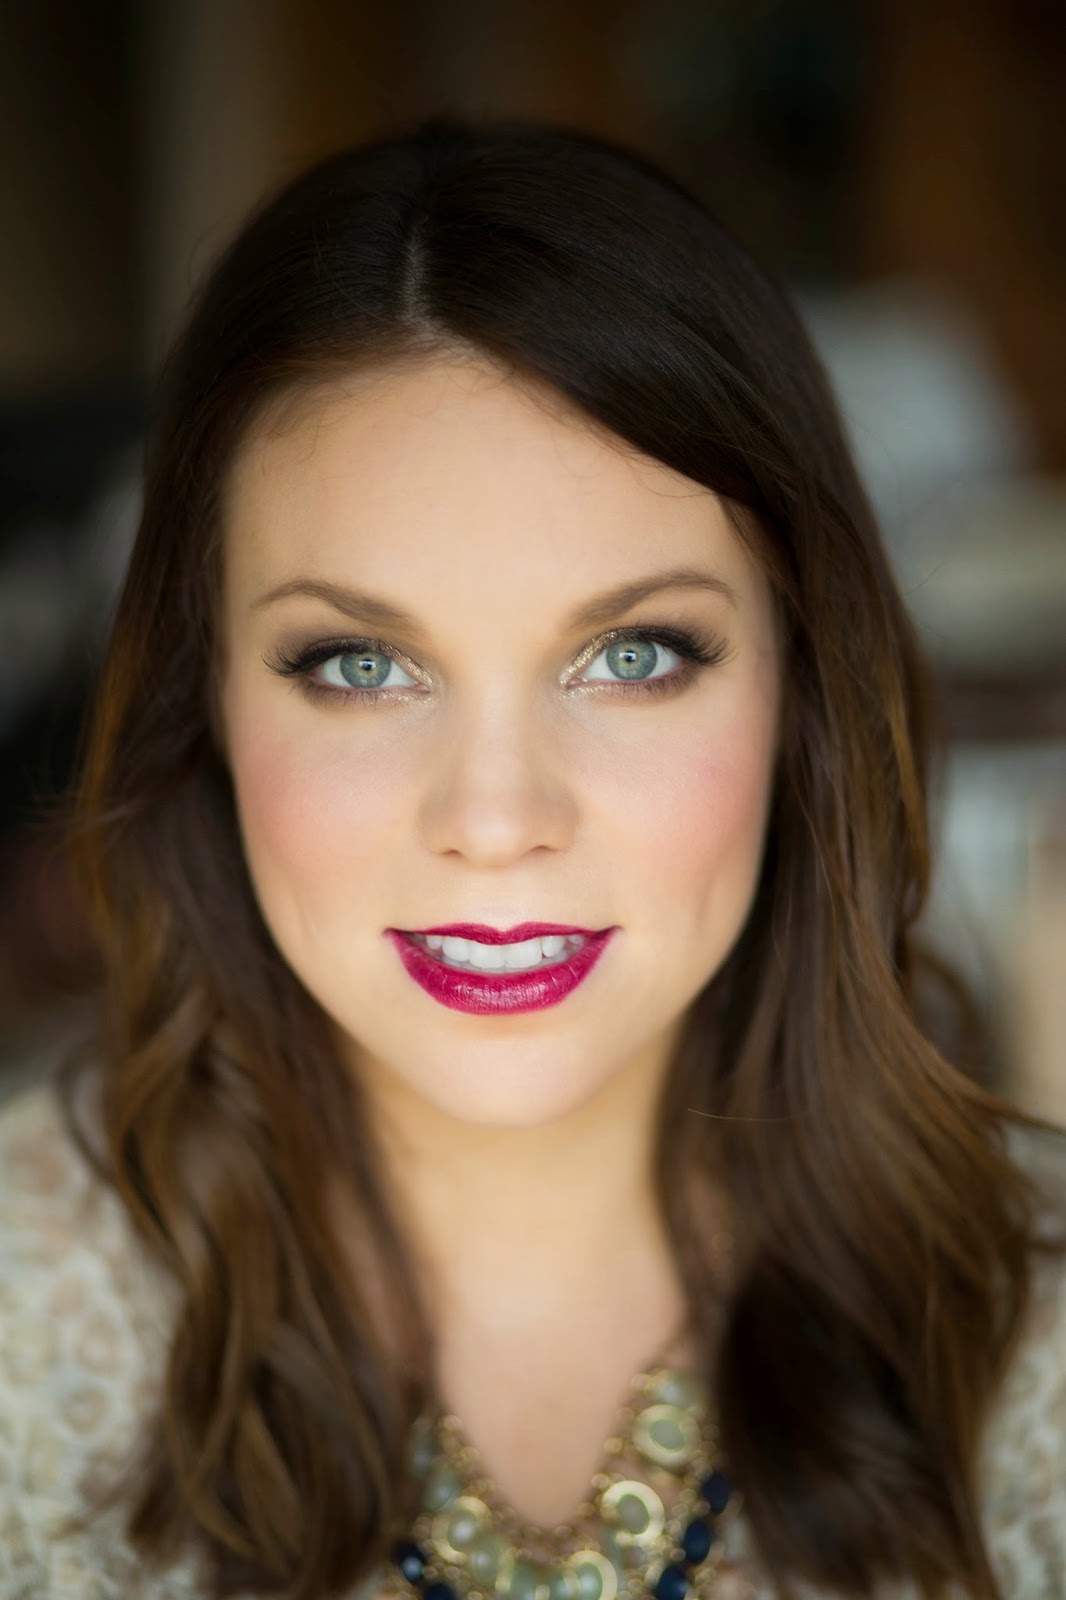
If you're wanting to take it up a few notches, and really glam up your look...then we'll need more sparkle and lipstick! I used the "Liquid Crystal Liner" by NYX, in the shade "Crystal Gold", which is a beautiful bright gold! Apply this to the inner corners of your eyes, bringing it down about a quarter of the way on your lower lashline. This really brightens up your eyes, and definitely gives you that extra pizzazz! As for the lips, dark berry colors are really in this season. We went for it, and were not disappointed! I used the "Wonder Lip Paint" by J.cat, in the shade "Red Potion", with a "Professional Concealer Brush" by e.l.f. This stuff is no joke...a tiny dot on a lip brush will cover your lips, and last like a lip stain without drying your lips.
AND...BAM! YOU ARE NOW READY TO DAZZLE EVERYONE AT THE PARTY!

I had so much fun creating this "Holiday Party" makeup look for you all! I'm just in LOVE with how all the photos came out, and can't thank Shaylynn and Kari enough! I want to let you know that all of the products used and listed, and tried and true. I would never recommend something that I didn't love, and I am not biased to any brand names. I use high-end and drugstore products, because if I find something that works, I don't care how much it costs. That being said, I do believe that there are great drugstore alternatives for high-end products, and would be more than happy to give recommendations or one-on-one makeup lessons.
Here are more photos by Shaylynn Marie Photography for your enjoyment:


No comments:
Post a Comment